


Specifications :
Before you start, make sure the tablet is off.


Remove the SD card.


Remove the 2 Phillips screws that secure the back cover.


To separate the back cover, we must release the plastic hooks around the contour. We recommend the opening tool type "cortapizzas" to disassemble without scratches.


The speakers are glued to the back cover. Carefully separate that side by detaching the speakers.


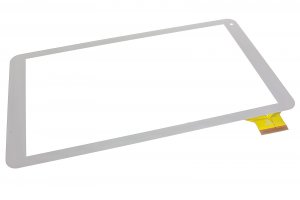
Disconnect the data flex from the touch screen. To do this, press the connector tab and pull the flex gently.


The screen is attached to the chassis by a strip of adhesive that runs all the way around. To detach it we will apply heat to soften the adhesive and to peel off easily.
In this guide we use a thermal mat, which we will adjust between 80 and 100 ºC. Warm the surface of the screen at this temperature for about 40 seconds.
Holding the glass with the suction cup, insert the prong between the glass and the plastic frame. Scroll the contour, taking off the adhesive.


Finally, separate the side where the data flex is located, passing it through the slot.


