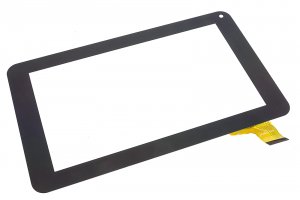
Prixton Mavericks 7 - Touch screen

Guide with all the necessary steps for you to change the touch screen of the Prixton Mavericks 7 tablet (T7012Q) yourself.
Difficulty
1
2
3
4
5

Tutorial: Step by step

Step 1 Prixton Mavericks 7

Specifications
Display: 7 "(800X480)
Operating System: Android 4.4
Camera: front 0.3Mp
Internal memory: 4Gb
RAM memory: 512Mb
Processor: Quad Core 1.2Ghz
Battery: 2,000mAh /

Before you start, make sure the tablet is off.

Step 2 Screws

Remove the 2 Phillips screws securing the back cover.

Note that one of them is covered by a warranty sticker.

Step 3 Back cover

Hold the screen with the suction cup and use the wide part of the double opening tool to release the plastic hooks around the contour of the lid.

Step 4

The speaker is attached to the lid. It will be necessary to detach it to separate the lid.

Step 5 Touch screen flex

Remove the adhesive covering the flex connector on the motherboard.

Unplug the flex from the motherboard. To do this, push the ends of the black part of the connector towards the flex and pull gently.

Step 6 Touch screen

The touch screen is attached to the chassis by a thin strip of double-sided adhesive, located all around the contour.

We will heat the glass to soften the adhesive and peel off easily.

We recommend our Hot Glass. A heat retention blanket with high thermal retention.

Simply insert the Hot Glass in the microwave for a couple of minutes (see instructions) and apply hot directly to the glass of the screen.

Step 7

Hold the screen with the suction cup.

Insert the barb behind the glass and go around the contour to release the adhesive.

Avoid the area of ??the flex with the prong to avoid damaging it.

Step 8

Finally, separate the touch screen.

Video Tutorial summary

In this video you can watch a quick summary of the tutorial, but we recommend to follow the complete tutorial, with its explanations and detailed images.
Share this tutorial