Guide with all the necessary steps for you to change the digitizer yourself (tactile) or the display of the Sony Xperia L.


Remove the battery cover. Use a plastic tool to avoid scratching or damaging the case.


Remove the battery by pulling on the bottom.


Remove the 6 Torx screws that hold the housing.


Separate the intermediate housing. Use a plastic tool to avoid damaging or scratching the equipment.


Disconnect the flex cables and the coaxial cable that hold the motherboard.


Take off the flex circuit that connects the digitizer.


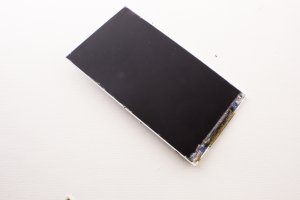
Separate the base plate.


Disconnect the coaxial cable and flex cable from the bottom plate.


Separate the bottom plate. This is slightly attached to the housing.


To remove the headset, simply detach it from the case.


Insert the HOT GLASS in the microwave for the time specified in the instructions for use.
If you heat it too long, the gel inside will expand and the bag will be inflated until the content is poured.
The last minute in the microwave is advised to interrupt every 15 seconds and knead the gel inside with your hands to distribute the heat.


Apply heat to the screen for a few minutes.
Insert a tine into the joint between the screen and the housing.
Move it around the contour gently to release the glue.
Try to avoid passing the prong through the flex cable area as it could damage or cut it.
Both the digitizer and the display are fragile, you should not force it as you could split them.
Repeat the previous step and apply heat as many times as necessary until it comes off easily.


Separate the digitizer from the rest of the screen taking care that the flex cable does not get stuck or bend, as it could damage it.


Apply heat again if necessary and lift off the housing display.


