Guide with all the steps necessary for you to change the components of the Innjoo Pro 2 yourself.


To begin with, with the help of the card removal tool we remove the tray.


Remove the trims, the top lever from the inside of the audio connector, and the lower trim removed by inserting the tip of a clip through the small hole that has the trim.


Remove the 6 Phillips screws (PH # 00) that hold the housing, and with the help of a metal tine remove the housing. Be careful with the side keys, since when removing the casing it is possible that they are released.


Remove the 5 Phillips screws (PH # 00) that hold the intermediate housing and remove it.


We disconnect and remove the battery.


We undo and take off the receiver.


Disconnect all components that prevent us from removing the motherboard, and take off the flex of the smart key that is stuck to the chassis.


Remove the Phillips screws (PH # 00) that hold the motherboard, and we can remove it.


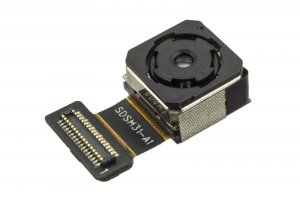
We disconnected the rear camera that we are going to replace.


