Guide with all the necessary steps for you to change the components of the Honor 9X (STK-LX1) yourself.


We apply heat to the back shell, and with a fine enough tool we will open a small hole through which we will introduce one or more plastic spikes, and thus there will be less risk of scratching the shell.


We disconnect the flex bridge that connects the fingerprint reader and the motherboard.


We remove the eleven Phillips screws (PH # 00) that hold the intermediate casing, and with a flat tool we will unhook it.


We disconnect the battery to work with greater security.


We extract the six Phillips screws (PH # 00) that hold the lower case, and with the help of a fine tool we will unhook it.


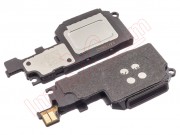
We unhook and remove the faulty speaker.