Guide with all the necessary steps so that you can change the digitizer (touch screen) of the GOCLEVER Fone 570Q yourself.


Before you start, turn off the phone and remove the stylus.


Separate the back cover with the opening tool, thus avoiding scratching or damaging the casing.


Remove the back cover.


Remove the battery by pulling it from the bottom.


Remove the SIM card by pushing it with your finger.


Remove the microSD card by pushing it with your finger.


Remove the 13 Phillips screws, including the one hidden by the sticker that has "JYL" written on it.


Separate the intermediate housing with the opening tool.


Remove the intermediate housing.


Disconnect the interconnection flex cable by pulling on the tab of the connector and pulling gently on it.


Disconnect the coaxial cable and remove the 3 Phillips screws.


Peel off the plate and, with a pair of needle nose pliers, disengage the microphone from the housing.


Remove the Phillips screw hidden under the adhesive.


Disconnect the data cables from the screen.


Peel off the flex from the side buttons with the pick and pull it out with forceps.


Seapare the plate at the top.


Disconnect the coaxial antenna cable.


Disconnect the data cable and separate the motherboard.


Separate the coaxial cable by pulling it.


Peel off the adhesive to access the flex cable.


With the prong take off the flex of the volume buttons.
Separate them from the housing with the help of tweezers.


Peel off the flex cable from the housing.


Using a pair of needle nose pliers, remove the handset.


Insert the HOT GLASS in the microwave for the time specified in the instructions for use.
If you heat it too long, the gel inside will expand and the bag will be inflated until the content is poured.
The last minute in the microwave is advised to interrupt every 15 seconds and knead the gel inside with your hands to distribute the heat.


Apply heat to the screen for a couple of minutes.


Insert the tip of the prong under the glass and move it around the contour of the phone to detach the glue.
Avoid the area of ??the flex cable to avoid cutting it.


Take off the bottom first.


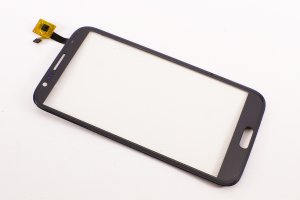
Separate the digitizer and avoid jamming or bending the flex cable, as it could damage it.


