Guide with all the necessary steps for you to change the components of the Asus Zenfone 3 (ZE552KL) yourself.


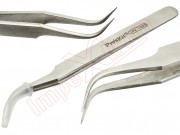
To begin we must take off the back cover, for this we must apply heat to the casing to detach it with greater ease, once applied enough heat we will introduce a fine tool and being careful not to damage the paint of the casing we will remove all the edges .


We extract the fifteen Phillips screws (PH # 00) that hold the module and the intermediate housing, and disconnect the coaxial cable and flex from the fingerprint reader.


Take off the vibrator, disconnect the flex from the screen and the interconnection, disconnect also the coaxial cable.


Remove the Phillips screw (PH # 00) that holds the auxiliary plate, and with the help of a flat tool we can remove the auxiliary plate.


We disconnect and take off the battery.


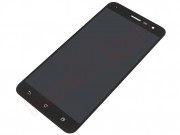
Apply heat to the screen to soften the adhesives that hold the chassis, take off the flex screen, and with the help of a very thin tool, we lift the screen enough to enter one or more prongs to detach all the edges of the screen. the screen that we are going to replace.