Guide with all the necessary steps so that you can change the components of the Apple iPhone 13 mini (A2628) yourself.


To start we must remove the two Pentalobe screws (TS1) from the bottom of the phone.


We apply heat to the screen to slightly soften the adhesive that holds it, and with the help of a suction cup and a fine tool we will unhook all the edges of the screen, bearing in mind that we will lift it to the left, as if from a book was about.


We remove the Triwing screw (Y0.6) that holds the shield that covers the battery connector among others, and with the help of a flat-tipped tool we will disconnect it to work with greater security.


We extract the two Triwing screws (Y0.6) and the Phillips screw (PH # 00) that hold the shield, and with the flat-tip tool we will disconnect the two connectors that join the screen to the motherboard.


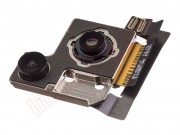
To remove the shield that covers the rear cameras, we must remove the three Phillips screws (PH # 00) that hold it.


And to finish we will disconnect the connectors from the cameras and we will be able to remove them.