Guide with all the necessary steps to change the BQ Edison 3 motherboard yourself.


To begin with we will have to remove the back cover. For this we will use a barb or any other plastic opening tool to avoid scratches.
Introduce the barb between the housing and the screen to unhook the notches that hold it.


To remove the motherboard we will have to disconnect the components. We start by disconnecting the antenna and the microphone.


We continue disconnecting the components of the board. In this step, we disconnected the proximity sensor, the two cameras and the microSD card reader module.


Finally, we will disconnect the flex from the audio connector, the vibrator, the flex from the push-button panel, the speaker cable and the battery.


Now we will remove the screws that hold the motherboard. Three of the screws are visible and one of them is behind the flex of the front camera. We will also remove the screws from the metal plate that hold the USB connector.


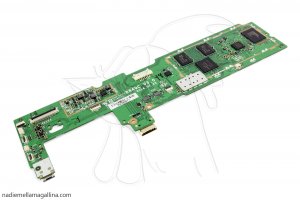
Having disconnected all the components and removed all the screws we can remove the base plate.


