Guide with all the necessary steps for you to change the home key of the Samsung Galaxy Grand Neo Plus yourself.


Before you start, make sure your mobile is turned off.


Remove the back cover, unhooking the contour with an opening tool.


Remove the battery, pulling on the bottom.


Remove the 10 Phillips screws (PH # 00) that secure the intermediate housing.


Separate the intermediate housing, unhooking the contour with an opening tool.
Use a suction cup to hold effectively from the screen.


Disconnect the front camera from the motherboard.
Disconnect the LCD data flex.
Unplug the flex from the ignition button, by pressing the connector tab.


Disconnect the flex from the audio connector.
Disconnect the flex from the volume buttons.


Remove the Phillips screw (PH # 00) from the bottom of the base plate.
Separate the base plate from the chassis by prying it very gently.
Use antistatic protective gloves to manipulate the base plate with your hands.


The touch screen is attached to the plastic frame with a strip of double-sided adhesive that runs along the contour.
In this guide we use the Hot Glass, a heating pad to insert in the microwave (see instructions) and once hot, apply on the surface of the screen.


Avoid the upper part, where the data flex is located since you can cut it with the pick.


When separating the bottom, consider the front buttons. These must be attached to the chassis.
Partially lift the touch screen. Just enough to be able to change the key.


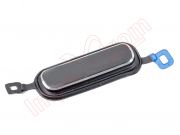
Finally, remove the home key.