Lenovo K3 Note - Flex with microphone

Guide with all the necessary steps so that you can change the flex with microphone of the Lenovo K3 Note yourself.

Difficulty
1
2
3
4
5

Tutorial: Step by step

Step 1 characteristics

Dimensions : 76.2 x 152.6 x 7.99 mm
Weight : 150 g
SoC : MediaTek MT6752
Processor : ARM Cortex-453, 1700 MHz, Number of cores: 8
Graphics processor : ARM Mali-T760 MP2, 700 MHz, Number of cores: 2
RAM memory : 2 GB, 800 MHz
Internal memory : 16 GB
Memory cards : microSD, microSDHC, microSDXC
Display : 5.5 in, IPS, 1080 x 1920 pixels, 24 bit
Battery : 3000 mAh, Li-Polymer (polymer lithium ion)
Operating system: Android 5.0 Lollipop
Camera : 4160 x 3120 pixels, 1920 x 1080 pixels, 30 fps
SIM card : Micro-SIM
Wi-Fi : a, b, g, n, Wi-Fi Hotspot, Wi-Fi Direct
USB : 2.0, Micro USB
Bluetooth : 4.1
Location / Navigation : GPS, A-GPS, GLONASS

Step 2 Back case

Remove the back cover, if necessary use a plastic opening tool.

Step 3 Battery

Then remove the battery from the phone.

Step 4 Cards

Remove all cards that are in the phone.

Step 5 Intermediate housing

Remove the 11 Phillips screws (PH # 00) that hold the middle housing.

Step 6

With the help of a plastic tool unhook the intermediate casing, carefully as it is quite well anchored.

Step 7 Motherboard

Disconnect all the components of the motherboard, to disconnect the cameras and to lift the tab of the display connector, we will use a plastic tool, but to remove the flex from the connector we will use a pair of tweezers.

Step 8

With a metal prong take off the flex of side buttons, and also remove the sticker to take off the interconnection flex.

Step 9 Interconnection Flex

We disconnect the coaxial cable, the vibrator and desoldamos the interconnection flex of the motherboard.

Step 10 Interconnection Flex

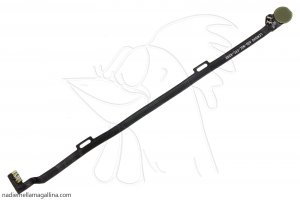
Finally we desoldamos the vibrator of the flex cable that we want to change.

Video Tutorial summary

In this video you can watch a quick summary of the tutorial, but we recommend to follow the complete tutorial, with its explanations and detailed images.
Share this tutorial